Home
» Knowledge
»
Coinbase Advanced Trade: A Complete Walkthrough for Beginners
Coinbase Advanced Trade: A Complete Walkthrough for Beginners
Updated September 16, 2026: Coinbase announced a major redesign of Coinbase Advanced on June 16, 2026, describing a modular interface that can place crypto and stocks side by side and let traders customize layouts with draggable widgets. The exact products and layout you see can vary by region, eligibility, device, and rollout status. The core spot-trading workflow, however, remains familiar: choose a market, read the chart and order book, select an order type, preview the trade, and manage the resulting order.
This walkthrough focuses on that durable beginner workflow rather than assuming every newly announced product is available in every account. It uses spot crypto examples, not leverage or derivatives. Coinbase says Advanced is intended for more experienced traders, but a beginner can still learn it safely by starting with small sizes, understanding each order type before using it, and checking the preview before submitting anything.
What is Coinbase Advanced Trade?
Coinbase Advanced is the advanced trading experience inside Coinbase. It replaced Coinbase Pro and uses the same Coinbase account and balances, so you do not need to maintain a separate Pro account. Coinbase says there is no separate subscription fee required to use Advanced. The platform adds TradingView-powered charts, an order book, live trade data, and advanced order types that give you more control over price and execution.
Compared with the standard Coinbase buy-and-sell flow, Advanced interacts directly with the order book. Coinbase states that no spread is included in Advanced trades; instead, trading fees follow a maker-taker model and depend on your applicable fee tier. Fee schedules can change, so do not memorize a percentage from an old guide. Check your fee tier and the fee shown in the order preview immediately before trading.
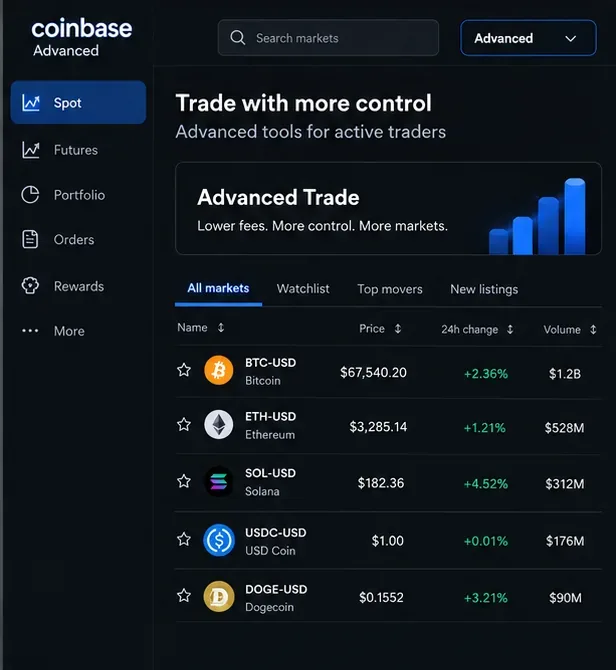
A markets-focused Advanced view helps you choose a trading pair before opening the full chart and order panel.
Before your first trade: three things to understand
1. A trading pair has two sides
A pair such as BTC-USD means Bitcoin is the base asset and U.S. dollars are the quote currency. A displayed price tells you how many units of the quote currency are being asked or paid for one unit of the base asset. If your account uses another supported fiat or crypto quote currency, the same logic applies.
2. The order book is not a guaranteed future price
The order book shows resting bids and asks available on Coinbase at that moment. It changes continuously. A large market order can fill at several prices, especially in a thin market, which is why the final average execution price can differ from the last traded price you saw on screen.
3. “Maker” and “taker” describe how your order executes
A taker order immediately matches existing liquidity. A maker order rests on the book and adds liquidity before another order matches it. Coinbase notes that an order can be partly taker and partly maker if one portion executes immediately and the remainder rests on the book.
Sign in to Coinbase using the official website or app, then switch to the Advanced experience. Coinbase says users can switch between the standard and Advanced experiences while keeping the same assets, balances, and history. The placement of the Advanced control can change as Coinbase rolls out its modular 2026 redesign, so rely on the product label rather than an old screenshot of a specific menu position.
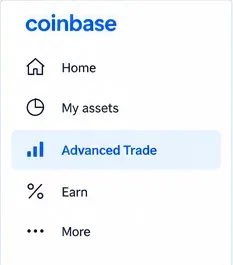
The Advanced entry may appear in a menu or toggle depending on device and rollout; look for the Advanced product label.
Step 2: Choose a market pair
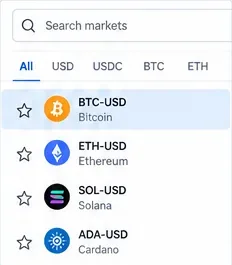
Use market search to find the asset and quote currency you actually intend to trade, such as BTC-USD. Do not choose a similarly named pair by habit: BTC-USDC and BTC-USD are different order books. Availability depends on your jurisdiction and account eligibility.
For a first practice session, spend a minute reading the market page before entering an amount. Note the current bid and ask, recent trades, 24-hour statistics, and whether the market appears liquid enough for the size you are considering.
Select the exact market pair you intend to trade; the quote currency matters as much as the asset symbol.
Step 3: Read the chart, order book, and open-orders area
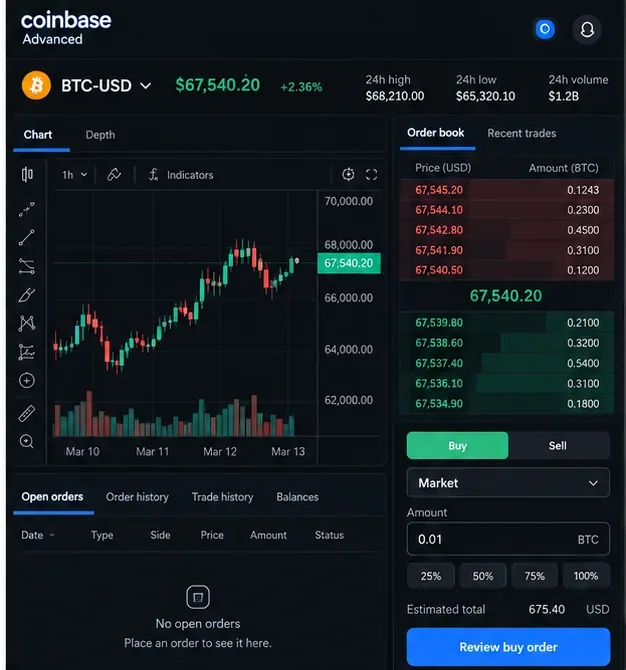
The Advanced dashboard combines several kinds of information. Coinbase documents a TradingView price chart, a depth chart, a live order book, an order panel, and an open-orders area. The chart tells you what price has done; the order book shows current resting liquidity; neither tells you what price must do next.
Beginners often over-focus on indicators. Start with the basics: the selected market, current bid/ask, spread, recent price range, and the size of nearby orders. Technical indicators can be useful, but they are not a substitute for understanding the order you are about to place.
The Advanced workspace combines chart context, live bids and asks, order entry, and order status in one view.
Step 4: Check your fee tier before choosing execution
Coinbase Advanced uses maker and taker fees. Coinbase says the applicable tier is based on trailing 30-day trading volume, and fee tiers update periodically. Eligible Advanced VIP users may also receive tier benefits based on program rules. Because pricing can change, the most reliable number is the one shown in your signed-in fee page and order preview.
A useful beginner habit is to compare the estimated fee with the size of the trade. A fee that looks small as a percentage can matter if you trade frequently. Also remember that market impact and price movement are separate from the explicit trading fee.
Step 5: Use a market order only when immediate execution is the priority
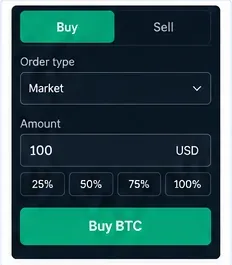
A market order seeks immediate execution at the best available prices. It is simple, but you give up control over the exact fill price. In fast or thin markets, the average fill can move away from the price shown when you clicked.
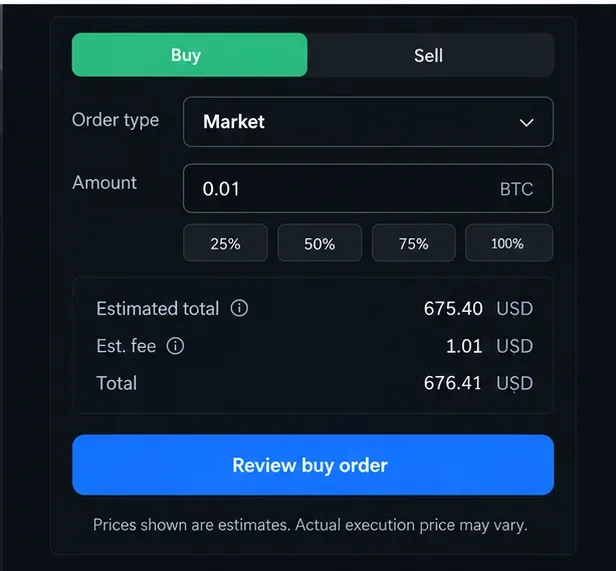
Enter the amount, review the estimated total and fee, and make sure the side is correct: Buy or Sell. If the preview is materially different from what you expected, stop and investigate rather than submitting out of habit.
A market-order ticket emphasizes speed; confirm the side, amount, and preview before submitting.The review stage is where you should verify the estimated total and fee before sending the order.
Step 6: Use a limit order when price control matters more than certainty of execution
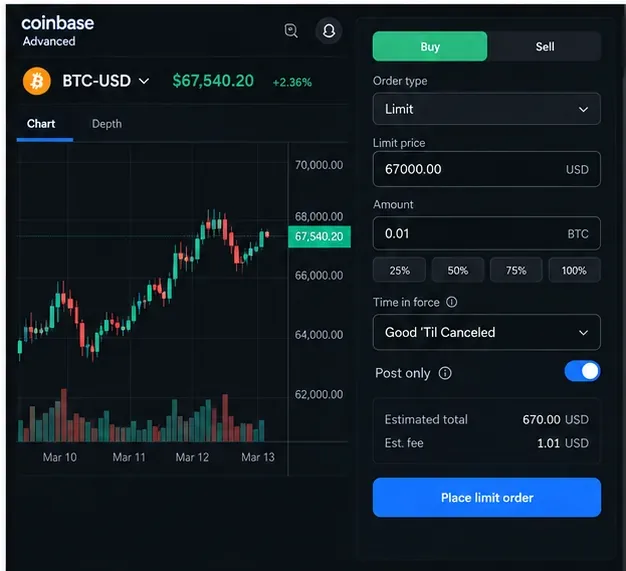
A limit order lets you specify the worst price you are willing to accept: a maximum price for a buy or a minimum price for a sell. The trade may fill immediately, later, partially, or not at all. A marketable limit order can still take liquidity and incur a taker fee.
Coinbase provides time-in-force settings for applicable orders. Common choices include Good ’Til Canceled, which remains open until filled or canceled, and Immediate or Cancel, which cancels any unfilled remainder after the immediate attempt. Coinbase also documents Good ’Til Time and Good ’Til Date for supported cases. If you enable a post-only setting where available, the intention is to keep the order from immediately taking liquidity; review the current on-screen behavior because available controls can vary by product.
A limit order gives you price control but does not guarantee that the order will fill.
Step 7: Learn stop-limit, take-profit/stop-loss, bracket, and TWAP orders before using them
Coinbase currently documents several advanced order types. A stop-limit order triggers a limit order when the stop price is reached. A take-profit/stop-loss instruction can attach predefined exit levels to an entry order. A bracket order places profit and loss targets around an existing position. Coinbase also documents TWAP, which splits a larger order into smaller scheduled executions over time.
These tools can help structure execution, but none eliminates risk. A stop-limit order can trigger and still fail to fill if the market moves beyond its limit price. Coinbase specifically warns that bracket protection is not guaranteed during extreme volatility. If you cannot explain the trigger, limit price, and possible non-fill scenario in plain English, keep learning before using the order type.
Step 8: Confirm the order, then monitor Orders until it is filled or canceled
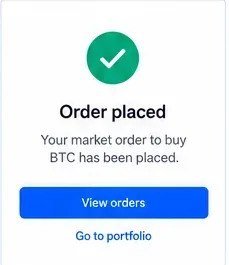
After submission, go to Orders rather than assuming the trade completed. Coinbase’s order-management view can show the pair, type, side, price, amount, percentage filled, total, fee, time, and status. Limit and stop-based orders may remain open, and orders can be partially filled.
If an order no longer matches your plan, cancel the unfilled remainder from the order-management view if the product allows it. A canceled remainder does not undo any portion that already filled.
After submitting, use the order-management view to verify whether the order is open, partially filled, filled, or canceled.
Market vs. limit vs. stop-limit: a beginner comparison
Order type
Main control
Key trade-off
Market
Execution speed
Fill price can move as available liquidity is consumed.
Limit
Maximum buy price or minimum sell price
May fill partially or not at all.
Stop-limit
Trigger plus limit price
Can trigger without filling if price moves beyond the limit.
Bracket / take-profit and stop-loss
Predefined exit levels
Helps structure exits but does not guarantee protection in fast markets.
TWAP
Execution spread over time
Reduces dependence on one instant but exposes you to prices throughout the schedule.
What changed in Coinbase Advanced in 2026?
On June 16, 2026, Coinbase announced a significant Advanced upgrade: a modular, cross-asset interface designed to show stocks and crypto side by side and let users choose templates or drag and drop widgets. Coinbase also described broader plans for spot and derivatives infrastructure. Those announcements matter because older tutorials that show one fixed desktop layout can now age quickly.
For a beginner, the practical lesson is simple: learn the function of each panel rather than memorizing its screen position. Market search, charting, the order book, order entry, fee preview, and order management are the durable concepts. Products such as stocks, futures, options, and other derivatives are subject to location, eligibility, and separate risk disclosures and are outside this spot-trading walkthrough.
Common beginner mistakes to avoid
Trading the wrong pair: double-check both the base asset and quote currency.
Assuming a market order fills at the displayed last price: market orders consume available liquidity and may fill across multiple prices.
Thinking every limit order is a maker order: a marketable limit order may execute immediately as taker liquidity.
Ignoring open orders: an unfilled order can remain active and execute later if its conditions are met.
Using stop-limit protection without understanding non-fill risk: triggering the order does not guarantee execution.
Relying on old fee tables: check the current signed-in fee tier and order preview.
Jumping into derivatives because they appear in the interface: availability and risk differ from spot trading, and leverage can magnify losses.
A simple first-session checklist
Confirm you are on the official Coinbase website or app and that your account security settings are in order.
Open Advanced and select one spot pair you understand.
Identify the bid, ask, spread, and recent price range.
Open your fee page and note the current maker and taker rates shown for your account.
Choose one order type and explain to yourself what would cause it to fill.
Use a small amount appropriate for learning rather than testing with a large position.
Read the preview, including the estimated fee, before submitting.
Open Orders and verify the actual status and fill details afterward.
Risk note: Crypto trading involves risk, including loss of principal. This walkthrough explains product mechanics and is not investment, tax, or legal advice.